We're an affiliate
We hope you love the products we recommend! Just so you know, we may collect a share of sales or other compensation from the links on this page. Thank you if you use our links, we really appreciate it!
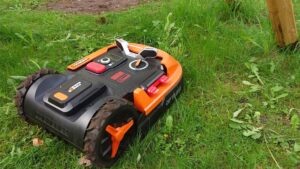
The installation of a robot mower – it can’t be complicated. Charging station to place, nail boundary wire, robot to work, and you can enjoy the freedom of mowing. 🙂 In fact, it was a little more complicated.
First of all, the loading station needs power, but it’s not available in a place suitable for the station. This concern is mostly overcome, either by making itself or preferably by using the service of a licensed electrician.
As a temporary solution, I installed an extension wire from the outside. I fixed the loading station with the plastic screws coming along.
The installation of the charging station required the use of a screwdriver key to turn the screws to the ground.
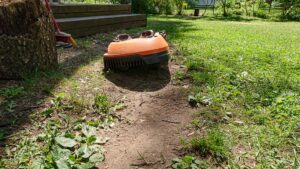
Then there was the queue on the cable. The barrier cable may be installed on the ground by fixing the plastic coming with nails or at a depth of 2-5 cm inside the ground. There is an appropriate device for the installation of a barrier cable on the ground, which can be rented.
I decided to install the cable on the ground at first, so it would be easy to move the cable if necessary.
I started the cable installation at the charging station, and I moved along the edge of the land against the clock.
Each model has its own recommendations for cable installation, and it is worth checking the instructions. The recommendations for Landroid were as follows:
Distance from the edge of the lawn:
If there is a edge, then 26 cm.
In the case of a flat surface, 10 cm Pounds step: 80 cm.
If there’s any consolation, confirm the lowest point.
In the case of a rectangular outer corner, the accompanying triangle shall be used to create a suitable path for the robot.
If there is a need to limit the access of a mower to some areas, such as flowerbeds, an ‘island’ can be created. To do that, take the perimeter cable to the perimeter area that needs siege. install the cable around the protected area and bring it back to the edge of the lawn next to the cable.
In this case, where the two cables are adjacent, the signals in their opposite directions cancel each other and the robot there does not ‘see’. At the same time, the cable around the restricted area creates a barrier and the mower does not drive beyond it.
You can find the instructions for making the “Isles” here.
Alternatively, the Worx robots have an add-on Off Limits. It consists of a sensor to be mounted on a robot and a magnetic strip to be mounted on the ground – mounted around an area to be restricted. This will take less of a cord, but I think it is more financially advantageous to use a cord.
It took a few hours to install the cable. The tools needed a hammer and handles.
As I was lazy in the past and did not measure the length of the cable needed, and in addition to making “isles” it took a significant amount of wire, it turned out that the wire carried was not enough. At the same time, I’d like to see the robot work. 🙂 Thus, the cable was drawn directly to the loading station and one third of the lawn area remained temporarily outside the mowing area.
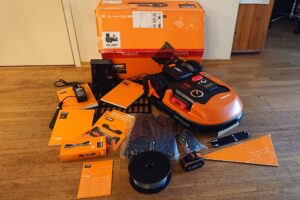
So that it doesn’t happen the way it does to me, it’s worth measuring first and, if necessary, immediately buying more fencing cables and fastening nails (in the end it took 3 additional rolls and two boxes of nails) in addition to some of the following:
In the first race of a robot mower, you can read here.
For installation You need tools. It can be universal household toolkit![]()
Or individual tools.